How to Clean Your Mirrorless Camera Sensor

Learn all of the ways to keep your camera sensor dust free! Don't have any camera sensor cleaning equipment? No problem. You will find some ways how to avoid sensor spots while talking photos.
This article may contain affiliate links. We earn a small commission when you purchase via those links — at no extra cost to you. It's only us (Becca & Dan) working on this website, so we value your support! Read our privacy policy and learn more about us.
Table of contents
- Why is cleaning your camera sensor important?
- How to clean your mirrorless camera sensor
- Tips and tricks for cleaning your mirrorless camera sensor
- What you’ll need to clean your mirrorless camera sensor
- How to check for dust on your camera sensor
- How can I prevent sensor spots on my camera sensor?
- How to clean your camera sensor without sensor swabs
- Tips for cleaning a camera sensor with no sensor swabs or rocket blower
- How to fix sensor dust spots using Adobe Lightroom
- Last-resort effort in cleaning your camera sensor
- Now that you have a clean sensor, enjoy shooting!
Cleaning your mirrorless camera sensor is an important step to keep your photos looking professional. If you have any camera with an exposed sensor, it’s inevitable that you’re going to get dust or dirt inside. When I look at some of my older photos, I notice so many ugly sensor spot marks in skies and within other light parts of the images.
For mirrorless cameras, the second you take off your lens, the sensor is exposed. For DSLR cameras, you have a mirror to protect your sensor.
Why is cleaning your camera sensor important?
The sensor is the most important part of your camera. It’s important to take care of your sensor so that you can continue to take great photos. Without cleaning your sensor, your images can appear spotty because of the collection of dust on your sensor. With a mirrorless camera, your sensor will get dirtier than on a DSLR camera if you’re changing lenses often.
If you have a fixed-lens camera, you might not actually ever need to clean your sensor because you won’t be changing lenses and exposing your sensor to dirt and dust elements.
How to clean your mirrorless camera sensor
Step 1
Most cameras have self-cleaning modes. Search your camera menu and give it a try. This is the easiest way to clean your mirrorless camera sensor. You won’t have to get near your sensor or even take your lens off!
Step 2
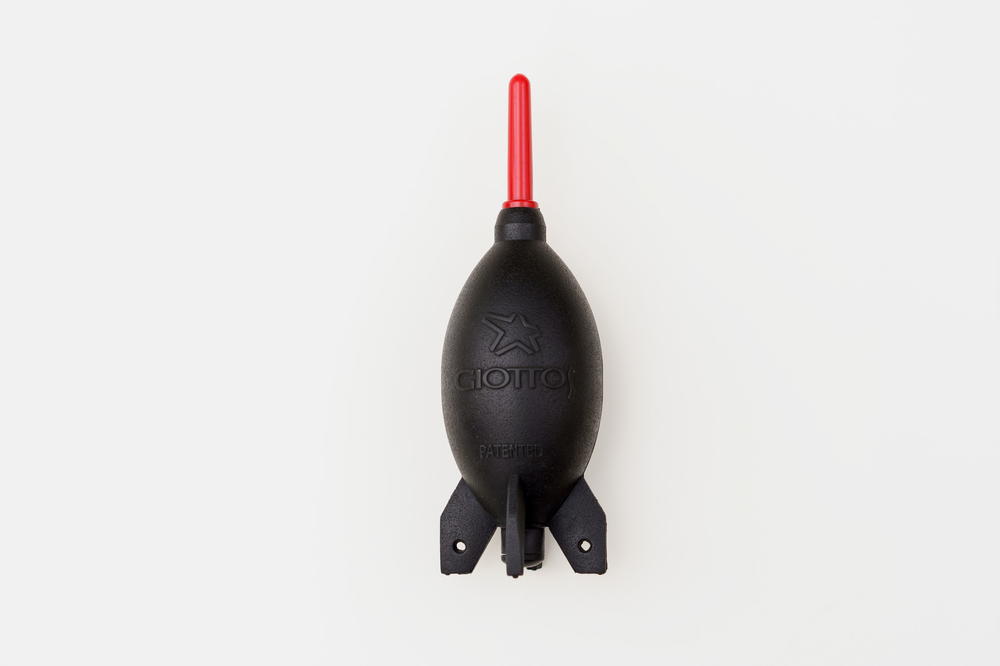
Use a rocket blower and gently force air into the sensor area. Hold your camera upside down so that dust and other stuff falls out. You’ll want to blow air in multiple directions to make sure anything loose will fall out. Be careful not to hold the front nozzle too close to your sensor.
Step 3
Use sensor swabs and gently pass a swab over your sensor. Make sure you are in a clean room. Bathrooms are usually a great place for sensor cleaning! If you have image stabilization turned on or enabled on your camera, turn it off so that the sensor is locked. You don’t want to damage your image stabilization by manually moving it around.
If you have a DSLR, you can enter into self-cleaning mode, which will flip the mirror up and expose the camera sensor. Also, make sure your camera is off when cleaning your sensor. If the camera is turned on, it might attract more dust to the sensor because of the electronics.
Tips and tricks for cleaning your mirrorless camera sensor
- Do not touch your sensor with anything other than a clean sensor swab.
- Do not use compressed air near your sensor or camera. This will damage your sensor and could damage other internal parts of your camera.
- Do not shake your camera. If you have any image stabilization, it could throw off the calibration.
- Do not keep your sensor exposed for too long. While you’re waiting to clean the sensor, you risk getting more things into or on your camera sensor.
- Do not splash water on your sensor. This will damage the internal parts of your camera and won’t be good for anything.
What you’ll need to clean your mirrorless camera sensor
You’ll need a rocket blower, sensor swabs and sensor cleaning solution. They’ve helped so much when I notice sensor spots on my photos and when I want to clean my camera sensor. This is all you need to have for cleaning your sensor and all these items are small, affordable and easy to use.
If you need a place to put all of your small cleaning accessories, consider a small tech bag to keep yourself organized.
I travel a lot and usually for extended periods of time. Almost every time I change my lens, I do a quick pass with the rocket blower to make sure no dust gets in. It’s been a powerful and effective tool. I couldn’t travel and shoot without it!
Camera sensor sizes mean different sensor swab sizes
When it comes to cleaning your sensor, it’s important to know your correct sensor size. If you’re getting any sensor swabs, something too big or too small won’t be as effective and may not actually clean your sensor. Take a look at this chart to determine your camera sensor size.
You’ll need to know this information when you buy your sensor swabs. Most sensor swab brands will likely tell you which brand of camera work with their swabs. For example, my Sony A7 III camera sensor uses the 24mm (Type 3) sensor swabs. The 17mm or 20mm swab wouldn’t fit the sensor and wouldn’t clean it all with the pass-through method.
How to check for dust on your camera sensor
Sensor spots are dust, dirt and other random particles that stick to the sensor inside your mirrorless or DSLR camera. Luckily, with mirrorless cameras, you get a live preview directly from the sensor. Whatever your camera sees is what you also see with help from the EVF (electric viewfinder). Because of this, you also get a live preview of your sensor spots, if you have any.
You can point the camera at a bright part of the sky or at a lightly-colored wall to determine if you have sensor spots.
Make sure your aperture is high when doing this initial check. When you close down your aperture (for example, moving from f/1.8 to f/22), the sensor spots become more visible. Pointing your camera at a consistent color and at a bright light source will help pick out the spots. If you’re looking at grass or at a brick wall, the texture from those elements will block out any of the sensor spots.
The easiest way to check if you have any dust or dirt on your sensor is to change your aperture to f/22 and take a photo of a white wall. You can zoom into the image and pan around and see exactly how much stuff is on your sensor.
The second-easiest way is to edit a photo into Lightroom. You can adjust contrast, tone curve and exposure to find all of the imperfections.
While you may see the imperfections, they won’t always be 100% visible. If you’re printing an image, you’ll want to ensure that it’s as clean as possible!
 1:1 close-up of sensor spots
 How can I prevent sensor spots on my camera sensor?
The best advice that I can give for preventing sensor spots on your sensor is to be really careful when you change your lens. Try to change your lens in a room where the air is “still” or where there isn’t much wind. Like I mentioned above, bathrooms are an excellent place to do this, as they typically are low on dust.
Another good preventative measure is to make sure that the back of your camera lens is totally clean before putting it on your camera. You can use your rocket blower or a microfiber cloth to gently remove any dust in the area.
As an added bonus, you’ll clean the contacts on the back of the lens and that is good for the overall lifespan of your lens.
How to clean your camera sensor without sensor swabs
Tips for cleaning a camera sensor with no sensor swabs or rocket blower
So, now you should know what sensor spots are, how to get rid of them and how to prevent them. What if everything fails? What if you have sensor spots, but you don’t have anything to clean them with? What if your sensor and lens are really dirty (mine usually are 😬)? Don’t worry! I have 3 quick tricks that can help you get out of a bind.
Find where the dust is on the sensor
If you have a really big piece of dust, look at your sensor and carefully (like, very carefully) inspect where that dust is. Gently give a quick blow (think like a whistle without making any sound) with your mouth or a wave of a piece of paper over your lens mount.
You’ll want to use the same principles as when using a rocket blower. Don’t get too close to your sensor, and keep your camera turned upside down. I’ll do this from time to time if there’s a big spot and if I left the house without my trusty rocket blower. Be really careful when you do this!
Shoot at lower apertures may help reduce sensor dust spot visibility
Shoot at lower apertures to limit the visibility of dust. This is my favorite trick, as I often always shoot below f/4 anyway. This will limit the sensor spot visibility in your photos or videos, but will not eliminate them entirely. It’ll help you get cleaner photos if you’re shooting the sky or something with simple backgrounds.
If you’re shooting video, this won’t be possible unless you have a neutral density filter to keep your aperture low. Or, you could adjust your shutter in order to get the aperture low.
I usually try to keep my shutter speed at 2x my frame rate. So, 24 frames per second would be a 1/50 shutter. Adjusting your shutter would work, but the motion blur wouldn’t be as natural.
Depending on the amount of dust, you’d have to evaluate if the sensor spot is better than the lack of motion blur.
 Image shot at f/2 Image shot at f/18
 How to fix sensor dust spots using Adobe Lightroom
Fix them in Adobe Lightroom with the spot remover tool! I generally don’t like doing this because it becomes very time-consuming if you have a lot of sensor spots. I’ve also found that it slows down the other edits on your photo if you have too many corrections. This is the best and quickest way to remove the sensor spots if you weren’t able to clean them before.
If you’re like me, and you sync edits across multiple photos, make sure to adjust the spot remover location so that you’re not changing the image in a way you were’t expecting. I’ve done this a few times by accident and accidentally shuffled around different parts of the image. Oops!
Adobe Photoshop can be a powerful tool in helping to remove your sensor spots from your images. You can use the content aware fill tool, clone stamp them out, use various patch and healing brushes and blending modes.
Photoshop can especially be helpful if you have a sensor spot on a portrait shot or in a tricky spot where a simple spot remover from Lightroom wouldn’t fix.
If Photoshop is out of your budget, check out some Photoshop alternatives!
Last-resort effort in cleaning your camera sensor
You can have your sensor professionally cleaned. I avoid this step mostly because I travel so often and for me, finding camera shops is sometimes a challenge.
A professional will clean your sensor much better than I can. A professional’s tools, rooms they use and their methods are better than what most people can do themselves. I do recommend this if you’re shooting lots of portraits or if you are changing your lenses in dusty environments very often.
You can keep an eye out for events held by your camera manufacturer or events like Photo Plus in New York City. You’ll be able to clean your sensor for free! However, the lines get pretty long if you want to get in and out quickly.
Now that you have a clean sensor, enjoy shooting!
I hope you were able to learn something from this article about easy ways to clean a camera sensor. These are the methods that I use when cleaning my own sensors on my cameras.
Travel photographers have it tough because we’re shooting in harsh conditions and don’t always have access to the best tools and resources. I think my major advice is to not be afraid to clean your sensor.
If you do clean your sensor yourself, I strongly advise: Be very careful cleaning your sensor. Don’t let your sensor come in contact with anything other than the sensor swabs. The sensor swabs should lightly pass over your sensor and you shouldn’t put too much solution on the swabs.
📷 Sharpening your photography with us?
We shoot, experiment and share the techniques that work, around the world. If these tips improved your shots, a coffee keeps us creating more photo guidance.
Support more photo tipsYou may also like
-
![A camera case with a camera inside of it.]()
Lensrentals Review: Is it Worth It?
Is Lensrentals a legitimate website for renting lenses? I review Lensrentals for cameras, lenses and photography gear, and including a Lensrentals promo code for a discount.
-
![A close up of a joby bendable tripod on a table]()
14 Best Camera Accessories for Photographers
What are the best camera accessories for photographers? Hack your photography skills with these gear recommendations for every type of photographer.
-
![]()
Photos Filling Up Your iPhone with iCloud Enabled? (Actual Fix)
Did your photos fill up your whole phone and is your iPhone saying your storage is full? Here’s what to do right now to fix the issue, even if you’ve enabled iCloud.
-
![A laptop on a table next to a cup of coffee.]()
Wondering how to get the most out of your Amazon Prime membership? Here's everything you need to know about using Amazon Photos.
-
![A glass of espresso on a wooden cutting board.]()
12 Ways to Help You Take Better Photos in Cafes
Cafe photography is challenging. To discover how to take photos in cafes and coffee shops, try these tips for how to deal with harsh light, dark interiors and color correction.
-
![A group of people taking pictures with their cell phones.]()
14 Best Photo Storage Options in 2026
For the best photo storage options, I’m listing foolproof and trustworthy solutions for storing your photos, from cloud storage to hard drives and helpful apps as well.